Compost Like a Pro: The Ultimate Beginner’s Guide (US)
Composting like a pro in the US involves understanding the right mix of greens and browns, choosing the appropriate composting method, and maintaining the pile for optimal decomposition, leading to nutrient-rich soil for your garden.
Ready to transform kitchen scraps and yard waste into valuable garden gold? This guide, **How to Compost Like a Pro: A Step-by-Step Guide for Beginners in US**, will teach you everything you need to know to start composting successfully, no matter your space or experience level.
Why You Should Compost: Benefits of Composting in the US
Composting is more than just a trendy eco-friendly activity; it’s a powerful way to reduce waste, enrich your garden, and contribute to a more sustainable lifestyle. In the US, where massive amounts of organic waste end up in landfills, composting offers an accessible solution.
Let’s explore the incredible benefits you’ll reap when you start composting:
Reduces Landfill Waste
A significant portion of household waste consists of organic materials like food scraps and yard trimmings. Composting diverts this waste from landfills, reducing methane emissions, a potent greenhouse gas that contributes to climate change.
Enriches Soil Naturally
Compost acts as a natural soil amendment, improving its structure, drainage, and fertility. It adds essential nutrients to the soil, leading to healthier and more productive plants.
- Improves water retention in sandy soils.
- Enhances drainage in clay soils.
- Provides slow-release nutrients for plant growth.
Reduces the Need for Chemical Fertilizers
By using compost, you can significantly reduce or even eliminate the need for synthetic fertilizers, which can harm the environment and disrupt soil ecosystems. Compost provides a balanced blend of nutrients, promoting robust plant growth naturally.
Composting is a win-win situation for your garden and the planet!
Choosing the Right Composting Method for Your Needs

There’s no one-size-fits-all approach to composting. The best method depends on your available space, time commitment, and the type of materials you want to compost. Let’s explore some popular options available to beginner composters in the US:
Consider these popular options, and find the one that best suits you:
Backyard Composting
A traditional method involving a compost pile or bin in your backyard. This is ideal for those with ample space and a steady supply of yard waste. You can use a simple open pile or invest in a compost bin to contain the materials and accelerate decomposition.
Tumbler Composting
Tumbler composters are enclosed bins that you rotate to aerate the compost. This method speeds up the decomposition process and is ideal for those who want faster results and less physical effort.
- Faster decomposition than traditional composting.
- Easier to turn and aerate the compost.
- Keeps rodents and pests out of the compost.
Vermicomposting (Worm Composting)
Vermicomposting uses worms to break down food scraps into nutrient-rich castings, a fantastic fertilizer for indoor and outdoor plants. This method is perfect for apartment dwellers or anyone with limited outdoor space.
Choosing the right method is the first step toward successful composting!
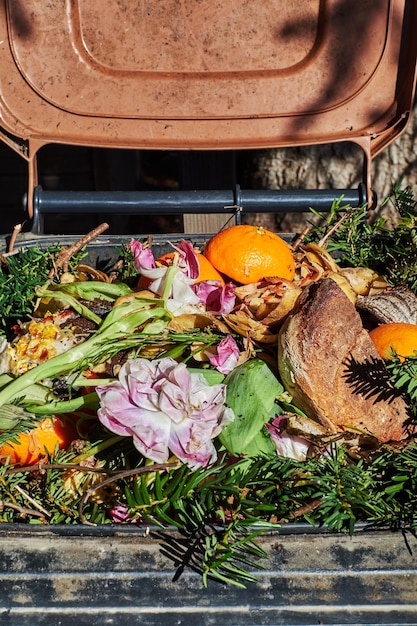
Gathering Your Composting Ingredients: Greens and Browns
The key to successful composting lies in maintaining the right balance of “greens” and “browns.” These are the two main types of materials that fuel the decomposition process.
Understanding the difference and maintaining the proper ratio is crucial:
Greens: Nitrogen-Rich Materials
Greens provide nitrogen, a vital nutrient for the microorganisms that break down organic matter. Examples of greens include:
- Food scraps (fruit and vegetable peels, coffee grounds, tea bags)
- Grass clippings
- Weeds (avoid weeds with seeds)
Browns: Carbon-Rich Materials
Browns provide carbon, which serves as an energy source for the microorganisms. Examples of browns include:
- Dried leaves
- Shredded paper and cardboard
- Straw
- Wood chips
Maintaining the Right Ratio
Aim for a ratio of approximately 2 parts browns to 1 part greens. This balance provides the ideal environment for decomposition. Too many greens can lead to a smelly, anaerobic pile, while too many browns can slow down the process.
Finding the ideal mixture will ensure your compost thrives.
Step-by-Step Guide to Building Your Compost Pile
Now that you understand the ingredients, let’s get down to the nitty-gritty of building your compost pile. Follow these steps for composting success in the US:
Follow these simple steps to create a compost pile that fosters healthy decomposition:
Step 1: Choose a Location
Select a well-drained location for your compost pile or bin. Ideally, choose a spot that receives partial sunlight to help warm the pile and promote decomposition. Consider the proximity to a water source for easy moistening.
Step 2: Start with a Base Layer
Begin by layering a bed of coarse browns at the bottom of your compost pile. This layer helps improve aeration and drainage. Twigs, branches, or wood chips work well for this purpose.
Step 3: Layer Greens and Browns
Alternate layers of greens and browns, ensuring a good mix of materials. Moisten each layer as you go, aiming for the consistency of a wrung-out sponge.
Step 4: Turn the Pile Regularly
Turning the compost pile every week or two helps aerate the materials and speeds up decomposition. Use a pitchfork or shovel to mix the ingredients thoroughly.
Step 5: Monitor Moisture and Temperature
Keep the compost pile consistently moist, but not waterlogged. Use a compost thermometer to monitor the temperature. The ideal temperature range for active composting is between 130°F and 160°F.
By following these steps, you’ll build a compost pile that is active and thriving.
Troubleshooting Common Composting Problems
Even the most experienced composters encounter challenges. Here are some common problems and how to fix them:
Don’t let common problems deter you. Here’s how to troubleshoot them:
Smelly Compost Pile
A foul odor indicates an anaerobic condition, usually caused by too much moisture or too many greens. Turn the pile to aerate it, and add more browns to absorb excess moisture.
Slow Decomposition
Slow decomposition can be due to a lack of moisture, a poor balance of greens and browns, or insufficient aeration. Add water to moisten the pile, adjust the ratio of greens to browns, and turn the pile regularly.
Pests in the Compost
Pests like flies and rodents can be attracted to compost piles, especially those containing meat or dairy products. Avoid composting these materials, and cover the pile with a layer of browns to deter pests.
With patience and troubleshooting, you will achieve success.
Harvesting and Using Your Homemade Compost
After several months of composting, you’ll be rewarded with rich, dark, crumbly compost ready to nourish your garden. But how do you know when it’s ready?
Harvesting your homemade compost is the satisfying culmination of your efforts:
Signs of Finished Compost
Finished compost should have a dark brown or black color, a crumbly texture, and an earthy smell. You should no longer be able to recognize the original ingredients. The temperature of the pile should be cool.
Harvesting Methods
Use a pitchfork or shovel to separate the finished compost from the unfinished materials. You can screen the compost to remove any large pieces or debris.
Using Your Compost
Compost can be used in various ways to improve your garden:
- Mix it into garden beds to enrich the soil.
- Use it as a top dressing around plants.
- Add it to potting mixes for container gardening.
- Make compost tea for foliar feeding.
Your garden will be grateful for the nutrient boost that compost provides!
| Key Point | Brief Description |
|---|---|
| 🌿 Greens & Browns | Maintain a 2:1 ratio of browns (carbon) to greens (nitrogen) for optimal decomposition. |
| 🔄 Turning the Pile | Aerating your compost pile regularly speeds up the decomposition process. |
| 💧 Moisture Levels | Keep your compost pile consistently moist, like a wrung-out sponge, to support microbial activity. |
| 🌡️ Monitoring | Use a thermometer to monitor the temperature and know if your pile is actively composting. |
Frequently Asked Questions (FAQ)
▼
Avoid composting meat, dairy, oily foods, diseased plants, and pet waste. These can attract pests, create unpleasant odors, and introduce harmful pathogens into your compost.
▼
The time it takes to make compost varies depending on the method and materials used. Backyard composting can take several months, while tumbler composting and vermicomposting can produce compost in a few weeks.
▼
Yes, you can compost in an apartment using vermicomposting. Worm bins are small, odorless, and can be kept indoors, making them ideal for apartment dwellers.
▼
Compost tea is a liquid fertilizer made by steeping compost in water. It’s rich in nutrients and beneficial microbes. To make it, soak compost in water for 24-48 hours, then strain and use as a foliar spray or soil drench.
▼
Finished compost will be dark brown or black, crumbly, and have an earthy smell. You shouldn’t be able to recognize the original materials. The temperature will also be cool.
Conclusion
Composting is a rewarding and environmentally friendly practice that can transform your garden and reduce your environmental impact. By following these tips and techniques, you can **how to compost like a pro** and reap the benefits of nutrient-rich compost for years to come. Happy composting!


